Matt Sealer

Travertine Kitchen Floor Before and After Cleaning Parwich

Dirty Travertine Kitchen Floor Deep Cleaned and Polished in Parwich

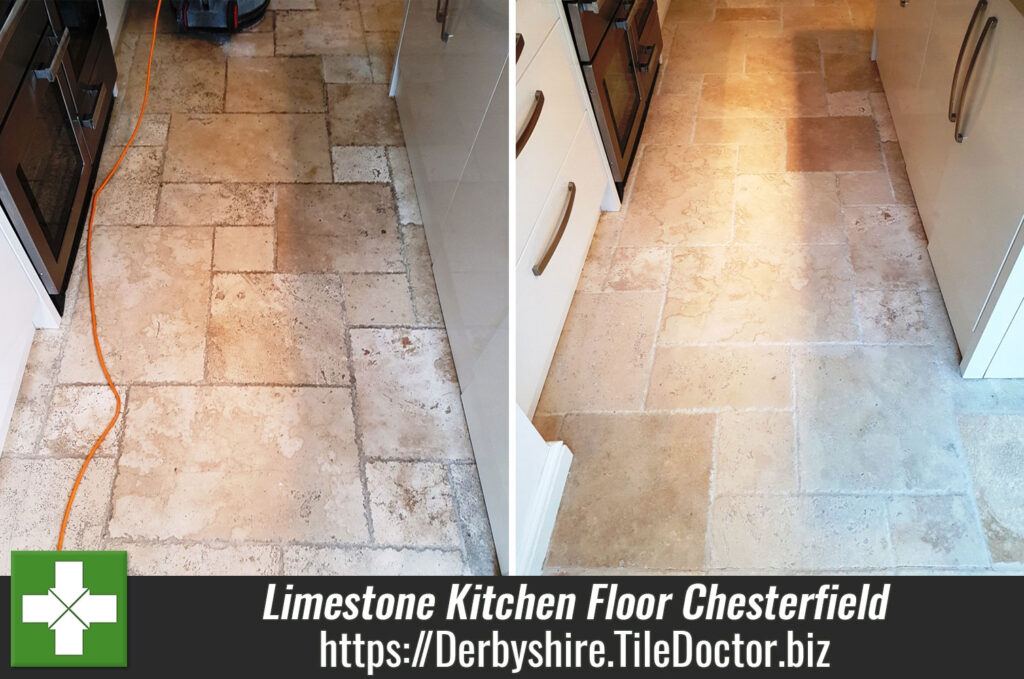
A few years ago, my client moved into a house in the village of in Parwich which sits in the Derbyshire Peak District. They had good methods for cleaning but complained that the Travertine tiled kitchen floor never actually looked clean afterwards. The main problems were the grout and the holes in the Travertine tiles both of which attracted dirt and proved difficult to clean effectively.

Travertine Kitchen Floor Before Cleaning Parwich
Ideally, they would like the Travertine to have a sheen finish, so I went over to take a look, discussed what treatment could be done to get the floor looking its best and showed them some examples. We also discussed the different types of sealers that could be applied to protect the floor once it had been cleaned. They were happy for me to do the work, so we agreed a date for my return.

Travertine Kitchen Floor Before Cleaning Parwich

Deep Cleaning and Polishing Travertine Kitchen Tiles

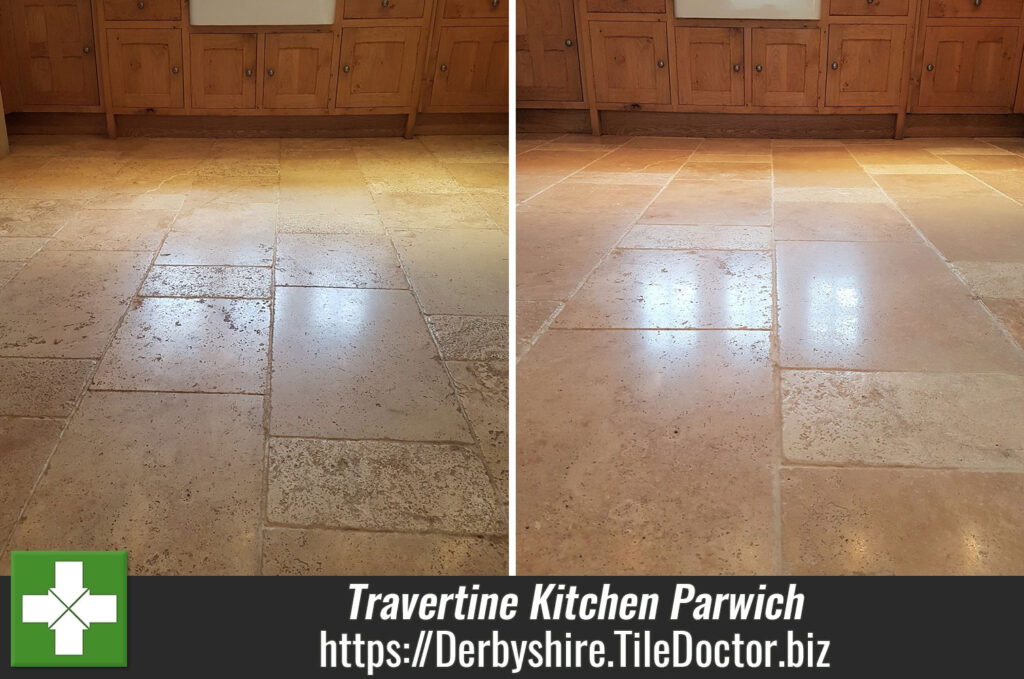
When I returned my first task was to add protection to the beautiful wooden kitchen, so it wouldn’t get splashed during the cleaning process. Once that was done I set about burnishing the stone floor with a set of diamond encrusted pads fitted to my rotary buffer machine running as slow speed. I started with the coarse 400-grit pad lubricated with water and then after running it over the whole floor I rinsed off the resultant residue with water which was then extracted with a wet vacuum.

The next step was to get the grout clean and for this a ran a strong dilution of Tile Doctor Pro-Clean along the grout lines and then scrubbed it in by hand using a stiff grout brush until I was happy with the result. Pro-Clean is our go to product for grout cleaning and being alkaline based its safe to use on all types of tile and stone. The now soiled cleaning solution was rinsed off with water and then extracted as before using the wet vacuum.

This burnishing process was then continued using an 800-grit and then a 1500 grit burnishing pads, again with water to help lubricate. These medium and fine pads slowly start to build the polish back on the stone and close the pores. As before water was used to rinse off the residue and the vet vacuum used to get the floor as dry as possible afterwards.

The last pad in the set of four Burnishing Pads is the very fine 3000-grit pad and this pad is applied dry with a small amount of water sprayed onto the floor as you go, we call this process a spray burnish and it really adds the nice subtle sheen the customer was looking for.

Sealing a Travertine Tiled Floor

The last step in the renovation process was to seal the floor with a suitable sealer which will protect the Travertine from staining going forward and make the floor much easier to clean.
Having discussed sealers with the customer at the beginning the choice was clear and two coats of Tile Doctor Ultra Seal were applied to the floor. Ultra-Seal is a premium product that soaks into the pores of the stone protecting it from within but without enhancing the look of the stone in anyway.

Travertine Kitchen Floor After Cleaning Parwich
It’s probably difficult to appreciate the full difference from the photographs above by my customer was very happy with the improvement and they now have the floor looking the way they wanted.

Travertine Kitchen Floor After Cleaning Parwich
 

Professional Restoration of a Dull Travertine Tiled Kitchen Floor in Derbyshire

Dirty Travertine Kitchen Floor Deep Cleaned and Polished in Parwich Read More »

Limestone Kitchen Floor Before and After Cleaning Chesterfield

Dull Limestone Kitchen Floor Burnished and Polished in Chesterfield

You can’t beat the natural beauty of a stone floor, but you will find that over time the protective sealer wears down and dirt becomes ingrained in the pores of the stone. This process is so gradual you might not notice it until one day your looking at old photographs and realise the difference.

On this occasion a customer of mine had a Limestone tiled floor installed in the Kitchen of her house in Chesterfield fifteen years prior. It had never been deep cleaned and resealed since being installed and having recently completed a house extension with a new Limestone floor she realised just how dirty and tired the original floor now looked.

Limestone Kitchen Floor Before Cleaning Chesterfield Limestone Kitchen Floor Before Cleaning Chesterfield

I went over to take a look at the floor, demonstrate the cleaning process and discuss the different sealers we have available. She has happy for me to do the work and specified she didn’t want the floor to have a gloss appearance, so a matt sealer would be best.

Deep Cleaning a Dirty Limestone Tiled Floor

I returned a few weeks later to carry out the work and started by adding protection to the Kitchen units. The Limestone has quite ingrained and had quite a few scratches in the stone that would need to be grinded out so fitted a very coarse 100 grit diamond encrusted burnishing pad fitted to my heavy rotary floor buffer. You apply water to help lubricate the process and then once finished the floor is rinsed with more water and the soil extracted with a wet vacuum.

The next step was to get the grout as clean as possible by applying a strong dilution of Tile Doctor Pro-Clean and then scrubbing it by hand with a stiff narrow brush. This action released the dirt from the grout and was rinsed away again with water extracted using the wet vacuum.

This burnishing process was then repeated using a 200 grit and then 400 grit burnishing pads to refine the finish of the stone and close the pores, again water was used to rinse off the soil and the vet vacuum used to get the floor as dry as possible.

Whilst drying the floor with the wet vacuum I also inspected the floor and identified areas for further spot treatment. I also noticed a few places where the grout had crumbled and needed replacing and so this was raked out and re-grouted with a beige grout.

Sealing a Limestone Tiled Floor

The next morning, I returned to the property to finish off the floor with the matt sealer we had discussed earlier. The floor must be dry before applying the sealer, so I took a few readings with a damp meter first to ensure that was the case. This is important as it’s not unusual for sealers to go milky or ever peel off later if the floor hasn’t been thoroughly cleaned or wasn’t dry when the sealer was applied.

Limestone Kitchen Floor During Cleaning Chesterfield
All was well, so I started applying the sealer which in this case was Tile Doctor Ultra Seal, it’s a matt sealer that protects the stone from within by impregnating the pores with sealant without altering its appearance.

Limestone Kitchen Floor After Cleaning Chesterfield Limestone Kitchen Floor After Cleaning Chesterfield

My customer was very happy with the result and now has two matching Limestone tiled floors, she also left the following short comment on the Tile Doctor feedback system.

Great job, faultless ….. thanku
Anne M, Chesterfield

Professional Restoration of a Dull Limestone Tiled Kitchen Floor in Derbyshire

Dull Limestone Kitchen Floor Burnished and Polished in Chesterfield Read More »

Scroll to Top