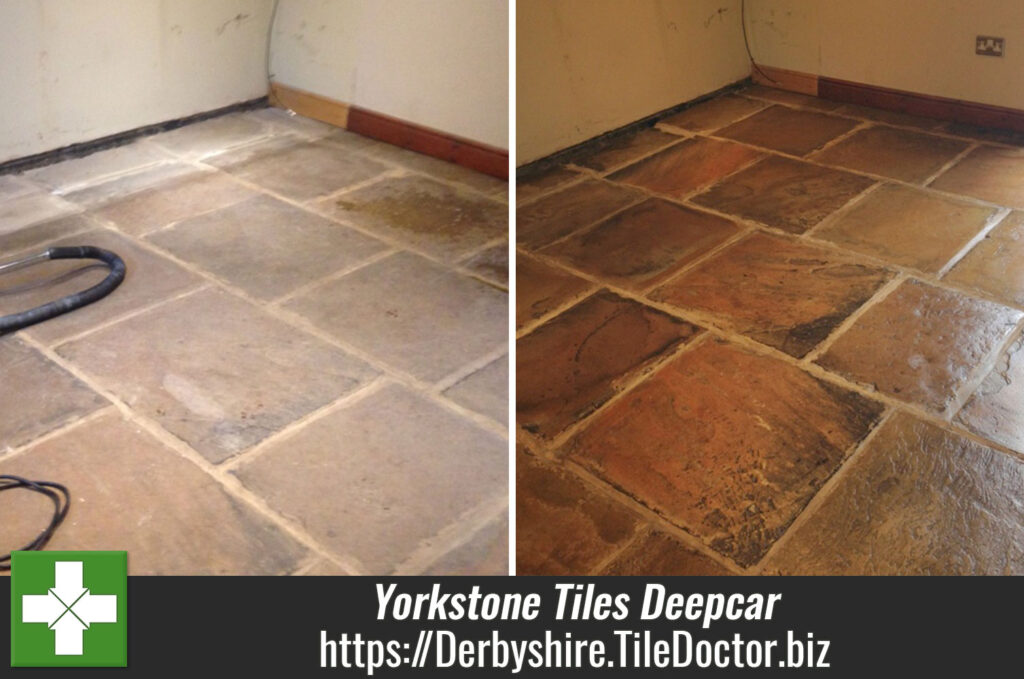
Porcelain Tiled Floor Grout Colouring Glossop
The tiled floor shown in the photographs below are from a client who lives in Glossop which is a market town in the Derbyshire Peak District between Manchester and Sheffield. I was contacted me to see if it would be possible to recolour the grout, it turns out they had been a little disappointed with the white grout colour they had chosen and preferred the more defined look a darker grout would have given.
I went to survey the floor and could see the tiles were Porcelain which are a good choice for busy common areas as they are very tough, easily cleaned and usually don’t need to be sealed. Grout however is cementous and the top layer is porous which can allows it to be easily stained, a problem which is more evident on white grout which is therefore not the best choice for a kitchen.

The tiled floor area was approximately 25 square meters, but big tiles and thin grout lines would make this a reasonably quick job to complete. We agreed a cost and I arranged a date, the job would be done across two days to allow the grout time to dry after deep cleaning on day one.
Cleaning Porcelain Tiled Floor Grout
To get the best results and achieve a superior bond between with the colourant it was important to get the grout as clean as it could be. To this end I gave the grout a good scrub with a strong dilution of Tile Doctor Pro-Clean which is a stripper and degreaser that is safe to use on tile and grout and great for removing dirt from heavily soiled stone or grout.
Floor scrubbing machines can struggle to reach into the grout recess, so I find the best way to clean grout is by hand using a soft steel brush. This action cleaned up the grout well and the now soiled Pro-Clean was rinsed off the floor with clean water and then extracted with a wet vacuum. I then inspected the floor to make sure I was happy and re-treated a few areas that needed more work.
I wanted the grout to be bone dry before applying the grout colourant so after cleaning the grout I left and agreed to come back the next day to complete the job.
Grout Colouring a Porcelain Tiled Floor
When I arrived in the morning I could see the grout was fully dry and ready to be recoloured. Because I needed to recolour from white to natural grey I only needed one thick coat of Natural Grey grout colourant which was carefully applied with a small brush and any excess wiped off the tile as I went along. In fact, even after retouching I found that with such narrow grout lines and large format tiles I only used half a bottle of natural grey colourant to complete the job.

The job was all complete and the floor looking completely different. The client was over the moon with the finish and we had achieved exactly what they were looking for. The grout colourant also forms a barrier over the grout sealing it in and so they will find this floor is very easy to keep cleaning going forward.
Recolouring White Grout to Natural Grey in Derbyshire
Porcelain Tiled Floor Grout Colouring Glossop Read More »