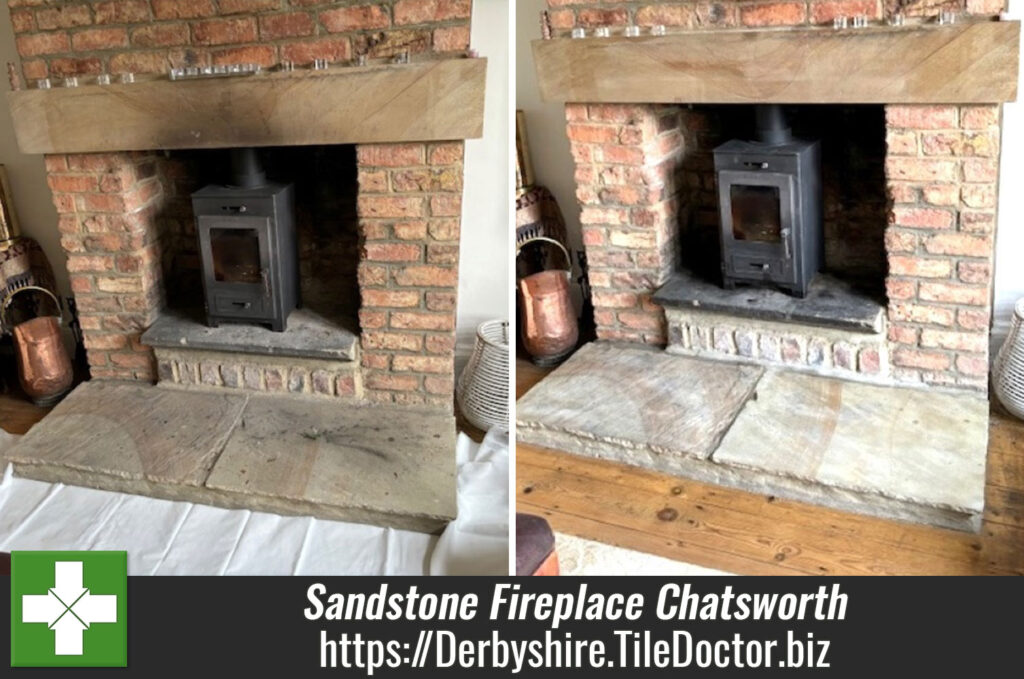
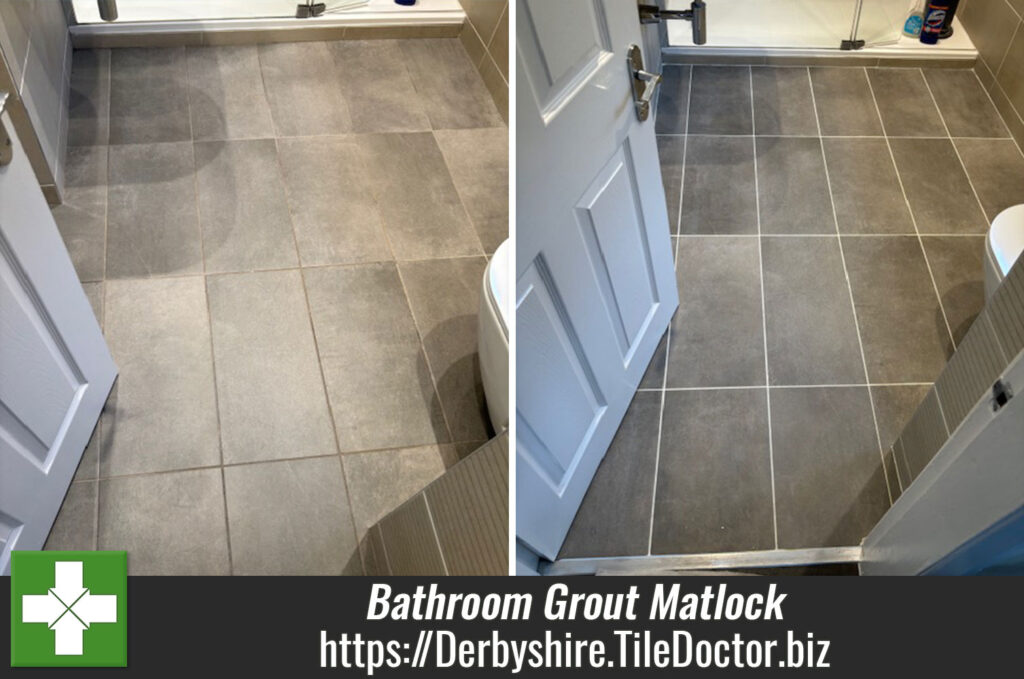
derbyshire

Shower Cubicle Before After Renovation Chapel-en-le-Frith

Shower Cubicle Cleaning Chapel-en-le-Frith

This client lives in Chapel-en-le-Frith which is a small town dubbed the ‘Capital of the Peak’ with parts of the parish lying in the Peak District National Park. They were trying to sell the house, but the shower cubicle was looking very bad and all the potential purchasers were being put off. They wanted to restore a new and fresh look, without spending a fortune, so they could finally sell it and move to their new property. With this in mind they had given me a call to come and take a look and see what could be done.

As you can see from the photos the grout was very badly discoloured in places, so I agreed with the client that the best course of action would be to clean the grout as much as possible and then recolour it with a white Grout Colourant followed by stripping off the old silicone and replacing with new. We discussed the cost and a timescale and booked the job in.

Shower Cubicle Before Cleaning Chapel-en-le-Frith

Shower Cubicle Tile Cleaning

The Tile Doctor Grout Colourant Kit comes with everything you need to change the colour of your grout including a Pre-Treat cleaner which is a slightly acidic product that cleans and etches your grout at the same time. This means you can get a better bond with the colourant when it is applied afterwards and ensures the best finish.

I set about cleaning the grout with the pre-treat cleaner which is sprayed on to the tile and then scrubbed in with an abrasive pad. This was then rinsed off with water and re-applied where necessary, some areas were worse than others and needed more work, so I persevered until I was happy the grout was as clean as it could be.

Applying White Grout Colourant

The job could be completed in one day, so the next job was to remove the silicone sealant between the tiles and the shower tray, the sealant was black with mould and dirt and generally in very bad condition.

Once the grout had dried I was able to start the application of the grout colourant using a small brush, wiping any excess off the tiles as I went. A steady hand is required for this job along with a little patience! Two coats of colourant were required to achieve the right finish.

Finally, the last step to complete was to put back a new white silicone sealant using a high-quality mould resistant product. There are many on the market, but the cheaper brands are not usually mould resistant and tend to turn black very quickly. Applying the sealant ensures the shower is waterproof and no water can get behind the tiles.

Shower Cubicle After Cleaning Chapel-en-le-Frith

The shower cubicle had a new look and my client was really surprised about the end result. They now felt more confident that potential purchasers wouldn’t be put off by a grubby looking bathroom. Thankfully it had not cost them too much to make it look a whole lot more appealing.

Shower Cubicle After Cleaning Chapel-en-le-Frith


Professional Clean and Re Grout of a Shower Cubicle in Derbyshire

Shower Cubicle Cleaning Chapel-en-le-Frith Read More »

White Grout Recoloured Natural Grey Glosso

Porcelain Tiled Floor Grout Colouring Glossop

The tiled floor shown in the photographs below are from a client who lives in Glossop which is a market town in the Derbyshire Peak District between Manchester and Sheffield. I was contacted me to see if it would be possible to recolour the grout, it turns out they had been a little disappointed with the white grout colour they had chosen and preferred the more defined look a darker grout would have given.

I went to survey the floor and could see the tiles were Porcelain which are a good choice for busy common areas as they are very tough, easily cleaned and usually don’t need to be sealed. Grout however is cementous and the top layer is porous which can allows it to be easily stained, a problem which is more evident on white grout which is therefore not the best choice for a kitchen.

Porcelain Tiled Floor Grout Before Colouring Glossop

The tiled floor area was approximately 25 square meters, but big tiles and thin grout lines would make this a reasonably quick job to complete. We agreed a cost and I arranged a date, the job would be done across two days to allow the grout time to dry after deep cleaning on day one.

Cleaning Porcelain Tiled Floor Grout

To get the best results and achieve a superior bond between with the colourant it was important to get the grout as clean as it could be. To this end I gave the grout a good scrub with a strong dilution of Tile Doctor Pro-Clean which is a stripper and degreaser that is safe to use on tile and grout and great for removing dirt from heavily soiled stone or grout.

Floor scrubbing machines can struggle to reach into the grout recess, so I find the best way to clean grout is by hand using a soft steel brush. This action cleaned up the grout well and the now soiled Pro-Clean was rinsed off the floor with clean water and then extracted with a wet vacuum. I then inspected the floor to make sure I was happy and re-treated a few areas that needed more work.

I wanted the grout to be bone dry before applying the grout colourant so after cleaning the grout I left and agreed to come back the next day to complete the job.

Grout Colouring a Porcelain Tiled Floor

When I arrived in the morning I could see the grout was fully dry and ready to be recoloured. Because I needed to recolour from white to natural grey I only needed one thick coat of Natural Grey grout colourant which was carefully applied with a small brush and any excess wiped off the tile as I went along. In fact, even after retouching I found that with such narrow grout lines and large format tiles I only used half a bottle of natural grey colourant to complete the job.

Porcelain Tiled Floor Grout After Colouring Glossop

The job was all complete and the floor looking completely different. The client was over the moon with the finish and we had achieved exactly what they were looking for. The grout colourant also forms a barrier over the grout sealing it in and so they will find this floor is very easy to keep cleaning going forward.


Recolouring White Grout to Natural Grey in Derbyshire

Porcelain Tiled Floor Grout Colouring Glossop Read More »

Quarry Tiled Floor Before and After Renovation Buxton

Cleaning Sealing Red and Black Quarry Floor Tiles Buxton

The photographs below are from a client who lives in an older property in Buxton which you may have heard of due to its famous spa and popular spring water. Buxton is situated in the county of Derbyshire, in the East Midlands and has the highest elevation of any market town in England.

The property had Red and Black Quarry tiles laid throughout the Kitchen and the downstairs in a diamond pattern. Quarry tiles are very hard wearing and thus a popular and traditional flooring option for high traffic areas in the past. Certainly, in this case they were in good physical condition given their age and they looked very much in-keeping with the period property along with the fireplaces.

Red Black Quarry Tiled Floor Before Cleaning Buxton
The client loved the feature floor but felt the tiles were looking neglected and they were struggling to keep them clean. This is a common problem with quarry tiles which are porous and need to be sealed to keep them looking good, however over time the sealer wears down with use and dirt becomes ingrained in the pores of the tile making them impossible to clean effectively. The client just wanted them to look clean and ensure they could be easily maintained.

Red Black Quarry Tiled Floor Before Cleaning Buxton
I recommended deep cleaning the tiles to remove the dirt and the sealing them to protect them going forward a process which usually takes around two days.

Cleaning and Restoring Quarry tiles

My quote was accepted, and I returned on the agreed date to complete the work starting with the first part of the process which involved removing the ingrained dirt, grime and any remaining sealer that may be present on the floor. To do this I applied a strong dilution of Tile Doctor Pro-Clean and left it to dwell for ten minutes. The Pro-Clean was then worked into the tile and grout using a black buffing pad fitted to a rotary machine. Once done the now soiled cleaning solution was rinsed off the floor with water and a wet vacuum was used to extract it from the floor. Some areas of tile were stained with paint slashes from decorating and these was spot treated with Tile Doctor Nanotech HBU which stands for Heavy Build-Up remover and is pretty good at dealing with all sorts of stains and tough soiling on tiled floors. The floor was then dried using the wet vacuum and left overnight to allow it to dry out thoroughly.

Sealing Quarry Floor Tiles

The client had left the radiators on overnight to aid the drying process and by the next morning the floor was nice and dry. I tested the moisture content to be sure and it was well within acceptable levels and therefore ready for the next stage. It’s important to ensure the tiles are dry before applying a sealer as the sealant won’t cure and the result will be compromised.

I sealed the floor a couple of coats of Tile Doctor Colour Grow sealer. I chose this product because the house had some damp problems due to its’ age and I decided a breathable fully sealer was the best option for this situation as this will allow moisture to rise-up through the tile and evaporate without causing any problems. Colour Grow works by soaking into the pores of the tile protecting it from within and improving the natural colours of the tile in the process.

Red Black Quarry Tiled Floor After Cleaning Buxton
The end result was the floor looked much cleaner and colours in the tiles were more vibrant, needless to say my client was very pleased with the result and the sealer will ensure the floor is easy to maintain floor for the future as per their brief.

Red Black Quarry Tiled Floor After Cleaning Buxton
 

Professional Restoration of Quarry Tiles in Derbyshire

Cleaning Sealing Red and Black Quarry Floor Tiles Buxton Read More »

Travertine Kitchen Floor Before and After Cleaning Parwich

Dirty Travertine Kitchen Floor Deep Cleaned and Polished in Parwich

A few years ago, my client moved into a house in the village of in Parwich which sits in the Derbyshire Peak District. They had good methods for cleaning but complained that the Travertine tiled kitchen floor never actually looked clean afterwards. The main problems were the grout and the holes in the Travertine tiles both of which attracted dirt and proved difficult to clean effectively.

Travertine Kitchen Floor Before Cleaning Parwich
Ideally, they would like the Travertine to have a sheen finish, so I went over to take a look, discussed what treatment could be done to get the floor looking its best and showed them some examples. We also discussed the different types of sealers that could be applied to protect the floor once it had been cleaned. They were happy for me to do the work, so we agreed a date for my return.

Travertine Kitchen Floor Before Cleaning Parwich

Deep Cleaning and Polishing Travertine Kitchen Tiles

When I returned my first task was to add protection to the beautiful wooden kitchen, so it wouldn’t get splashed during the cleaning process. Once that was done I set about burnishing the stone floor with a set of diamond encrusted pads fitted to my rotary buffer machine running as slow speed. I started with the coarse 400-grit pad lubricated with water and then after running it over the whole floor I rinsed off the resultant residue with water which was then extracted with a wet vacuum.

The next step was to get the grout clean and for this a ran a strong dilution of Tile Doctor Pro-Clean along the grout lines and then scrubbed it in by hand using a stiff grout brush until I was happy with the result. Pro-Clean is our go to product for grout cleaning and being alkaline based its safe to use on all types of tile and stone. The now soiled cleaning solution was rinsed off with water and then extracted as before using the wet vacuum.

This burnishing process was then continued using an 800-grit and then a 1500 grit burnishing pads, again with water to help lubricate. These medium and fine pads slowly start to build the polish back on the stone and close the pores. As before water was used to rinse off the residue and the vet vacuum used to get the floor as dry as possible afterwards.

The last pad in the set of four Burnishing Pads is the very fine 3000-grit pad and this pad is applied dry with a small amount of water sprayed onto the floor as you go, we call this process a spray burnish and it really adds the nice subtle sheen the customer was looking for.

Sealing a Travertine Tiled Floor

The last step in the renovation process was to seal the floor with a suitable sealer which will protect the Travertine from staining going forward and make the floor much easier to clean.
Having discussed sealers with the customer at the beginning the choice was clear and two coats of Tile Doctor Ultra Seal were applied to the floor. Ultra-Seal is a premium product that soaks into the pores of the stone protecting it from within but without enhancing the look of the stone in anyway.

Travertine Kitchen Floor After Cleaning Parwich
It’s probably difficult to appreciate the full difference from the photographs above by my customer was very happy with the improvement and they now have the floor looking the way they wanted.

Travertine Kitchen Floor After Cleaning Parwich
 

Professional Restoration of a Dull Travertine Tiled Kitchen Floor in Derbyshire

Dirty Travertine Kitchen Floor Deep Cleaned and Polished in Parwich Read More »

Terracotta Tiled Conservatory Before and After Cleaning Hope Valley

Removing Wax and Restoring Colour to a Terracotta Tiled Conservatory Floor

Terracotta Tiles have been around in certain parts of the world for over two millennia; in fact, the word Terracotta means burned earth. The ancient Romans used a variety of Terracotta tiles in their villas and palaces for many centuries.

Terracotta tiles are thicker than most modern tiles, giving them strength and durability. The one big downside to Terracotta, however, is that it has no glaze on the surface and can pick up and store muck and dirt very quickly. If you have ever owned a Terracotta floor before you will be able to relate to this problem.

Such was the dilemma facing our client in rural Hope Valley in the Peak District National Park of Derbyshire. Her Conservatory had been laid with Terracotta tiles around 25 years ago and over the years had been continuously covered with wax. Now, no matter how many times she mopped the floor it never looked clean because all the dirt over many years had been drawn in and sealed into the wax. She called in Tile Doctor to deep clean the floor and treat it with a gloss finish.

Terracotta Tiled Conservatory Before Cleaning Hope Valley

Cleaning a Terracotta conservatory floor

I started by removing the layers of wax with Tile Doctor Nano-Tech HBU (a heavy build-up remover that is designed to work where other cleaners won’t) and Tile Doctor Remove and Go, specially formulated to draw out ingrained stains and remove heavy grease build-up. I combined both products into a powerful cleaning cocktail and left them to soak into the floor for about twenty minutes. The solution was then scrubbed into the tile and grout using a black scrubbing pad fitted to a rotary machine. The resultant soil was rinsed off with water and then extracted from the floor using a wet vacuum.

After cleaning I inspected the floor and could see there was still some wax left in the grout between the Terracotta tiles, so I went over the floor with a hand-held steamer and scrub brush, it took some time, but the process was perfect to remove the last traces of wax. Finally, I washed the floor with clean water twice and left it to thoroughly dry overnight.

Terracotta Tiled Conservatory During Cleaning Hope Valley

Colour Restoring and Sealing a Terracotta tiled floor

The following day I went back to seal the floor but found there were still a few areas with higher levels of damp than I would have liked. My solution was to seal the tiles with Tile Doctor Colour Grow. This is a superb colour intensifying matt sealer that provides durable protection and enhance colour but importantly, it’s fully breathable therefore allowing any damp in the tiles to evaporate. I then left the floor to completely dry out, which took five days.

On my return I finished the sealing of the floor with four coats of Tile Doctor Seal and Go. This is a specially formulated water-based blend of acrylic polymers that provides a stain-resistant surface seal and a durable low-sheen finish that works really well on Terracotta.

Terracotta Tiled Conservatory During Sealing Hope Valley
The conservatory looked beautiful with its clean Terracotta tiles. The unsightly and grimy orange-brown floor had been restored to its original Terracotta colour with a very attractive sheen. And, of course, the floor was now correctly sealed to prevent the problem happening again and to make mopping easy. I left the house with good feeling!

Terracotta Tiled Conservatory After Cleaning Hope Valley
The customer was delighted and left this positive feedback:

“Henry did a brilliant job, friendly professional polite and efficient. He kept us fully informed of the procedures he was using. We would not hesitate to use him again or to recommend him to others.”

Terracotta Tiled Conservatory After Cleaning Hope Valley
 

Professional cleaning of a Terracotta tile conservatory floor in the Peak District National Park

Removing Wax and Restoring Colour to a Terracotta Tiled Conservatory Floor Read More »

Limestone Kitchen Floor Before and After Cleaning Chesterfield

Dull Limestone Kitchen Floor Burnished and Polished in Chesterfield

You can’t beat the natural beauty of a stone floor, but you will find that over time the protective sealer wears down and dirt becomes ingrained in the pores of the stone. This process is so gradual you might not notice it until one day your looking at old photographs and realise the difference.

On this occasion a customer of mine had a Limestone tiled floor installed in the Kitchen of her house in Chesterfield fifteen years prior. It had never been deep cleaned and resealed since being installed and having recently completed a house extension with a new Limestone floor she realised just how dirty and tired the original floor now looked.

Limestone Kitchen Floor Before Cleaning Chesterfield Limestone Kitchen Floor Before Cleaning Chesterfield

I went over to take a look at the floor, demonstrate the cleaning process and discuss the different sealers we have available. She has happy for me to do the work and specified she didn’t want the floor to have a gloss appearance, so a matt sealer would be best.

Deep Cleaning a Dirty Limestone Tiled Floor

I returned a few weeks later to carry out the work and started by adding protection to the Kitchen units. The Limestone has quite ingrained and had quite a few scratches in the stone that would need to be grinded out so fitted a very coarse 100 grit diamond encrusted burnishing pad fitted to my heavy rotary floor buffer. You apply water to help lubricate the process and then once finished the floor is rinsed with more water and the soil extracted with a wet vacuum.

The next step was to get the grout as clean as possible by applying a strong dilution of Tile Doctor Pro-Clean and then scrubbing it by hand with a stiff narrow brush. This action released the dirt from the grout and was rinsed away again with water extracted using the wet vacuum.

This burnishing process was then repeated using a 200 grit and then 400 grit burnishing pads to refine the finish of the stone and close the pores, again water was used to rinse off the soil and the vet vacuum used to get the floor as dry as possible.

Whilst drying the floor with the wet vacuum I also inspected the floor and identified areas for further spot treatment. I also noticed a few places where the grout had crumbled and needed replacing and so this was raked out and re-grouted with a beige grout.

Sealing a Limestone Tiled Floor

The next morning, I returned to the property to finish off the floor with the matt sealer we had discussed earlier. The floor must be dry before applying the sealer, so I took a few readings with a damp meter first to ensure that was the case. This is important as it’s not unusual for sealers to go milky or ever peel off later if the floor hasn’t been thoroughly cleaned or wasn’t dry when the sealer was applied.

Limestone Kitchen Floor During Cleaning Chesterfield
All was well, so I started applying the sealer which in this case was Tile Doctor Ultra Seal, it’s a matt sealer that protects the stone from within by impregnating the pores with sealant without altering its appearance.

Limestone Kitchen Floor After Cleaning Chesterfield Limestone Kitchen Floor After Cleaning Chesterfield

My customer was very happy with the result and now has two matching Limestone tiled floors, she also left the following short comment on the Tile Doctor feedback system.

Great job, faultless ….. thanku
Anne M, Chesterfield

Professional Restoration of a Dull Limestone Tiled Kitchen Floor in Derbyshire

Dull Limestone Kitchen Floor Burnished and Polished in Chesterfield Read More »

Old Black and Red Quarry Tiled Floor Before and After Cleaning Whaley Bridge

Black and Red Quarry Tile Renovation in Whaley Bridge

This was an unusual Quarry Tiled Floor that I was asked to renovate at a house in Whaley Bridge which is a small town in Derbyshire Peak district. The floor tiles were laid in a diamond pattern using alternating Black & Red quarry tiles. The house was more than 100 years old and recently changed hands. A large rug had previously occupied the middle of the floor and the tiles around the side has been painted over with black paint.

Old Black and Red Quarry Tiled Floor Before Cleaning Whaley Bridge
To restore the floor to a consistent appearance I could see the paint would need to be removed and then the whole floor given a deep clean and seal. Additionally, there was an old Fireplace at one end of the room decorated in antique Ceramic tiles that needed cleaning, the Tiles are very old but in good physical condition for their age.

Old Ceramic Tiled Fireplace Hearth Before Cleaning Whaley Bridge

Cleaning Old Black and Red Quarry Tiles

My first task was to remove the black paint and years of ground in dirty by treating the tiles with a poultice made from two Tile Doctor products namely Nano-Tech HBU Remover and Remove and Go. Working in sections the solution was applied to the tiles and left to soak in for a good twenty minutes before scrubbing with a rotary machine fitted with a black scrubbing pad running at slow speed.

The resulting soil was extracted using a wet vacuum and then the tiles rinsed with water, so I would see where more work was needed. Stubborn stains were then spot treated with the same process before moving onto the next section. The Ceramic tiles in the fireplace hearth was treated in the same way.

After removing all the dirt, stains and paint I gave the floor a final rinse to remove any trace of cleaning product and extracted as much moisture as possible using the wet vacuum. The floor would need to be dry before applying a sealer, so to allow the floor to fully dry off I left the floor for two days.

Sealing Original Quarry Hallway Tiles

On my return I checked the tiles first to ensure they were dry. All was good so I set about applying a couple of coats of Tile Doctor Colour Grow which is a colour enhancing impregnating sealer that occupies the pores in the clay. Additionally, Colour Grow is a breathable sealer which is important for these old floors that don’t have a damp proof course. There was no need to apply the sealer to the ceramic tiles in the hearth however as they won’t take a sealer due to the glaze.

Old Black and Red Quarry Tiled Floor After Cleaning Whaley Bridge
Once completed the floor looked completely transformed and the client was more than happy. Work continues in other parts of the house and once they have finished decorating they have asked me to return to restore their beautiful old Victorian tiled hallway.

Old Ceramic Tiled Fireplace Hearth After Cleaning Whaley Bridge
 

Professional Restoration of Original Quarry Hallway Tiles in the Peak District

Black and Red Quarry Tile Renovation in Whaley Bridge Read More »

Welsh Slate Kitchen Floor Tiles Before and After Cleaning and Sealing Ticknall Derby

Refreshing Dull Slate Kitchen Floor Tiles in Ticknall

This post comes from a lovely house in Ticknall, Derbyshire where the owner had installed a Welsh Slate Tiled Floor in their Kitchen ten years earlier. Welsh Slate is renowned the world over for its quality however ten years of use in a high traffic area such as a Kitchen does take its toll and the customer complained that she wanted the tiles to look colourful with a matt finish but they always looked dull and dirty even after cleaning with mop.

Welsh Slate Kitchen Floor Tiles Before Cleaning Ticknall Derby
Interested to know the history of the floor I asked when it was last sealed and apparently it had not been redone since it was installed. It was clear to me that any sealer had long since long worn off and now dirt was becoming trapped in the pores of the stone making it difficult to clean effectively.

Cleaning a Dirty Slate Tiled Floor

To get the Slate clean I applied a strong dilution of Tile Doctor Pro-Clean which as well as cleaning deep into the pores of the tile should also deal with any remaining sealer. I left it to soak into the tile for about ten minutes before working it in with a black scrubbing pad fitted to a rotary buffer machine. After this I rinsed the floor with water and extracted the now soiled cleaning solution with a wet vacuum.

At this point it became apparent there were some stubborn stains in front of the oven that needed dealing with so I scrubbed in a solution of Tile Doctor Grout Clean-Up which is an acid based product that is great for removing mineral deposits such as salts as well as grout smears. This worked well and the floor was now in ready for sealing so I gave the floor a good rinse to remove any trace of product and left it to dry.

Sealing a Slate Tiled Floor

The floor was about 7 square meters in size and being relatively modern it had a Damp Proof Membrane and Underfloor Heating installed, as a result it was fully dry within three hours and ready to take a sealer.

With the floor now dry I started applying the sealer which in this case was Tile Doctor Colour Grow. Colour Grow is an impregnating sealer that penetrates deep into the pores of the stone, thus acting as a shield against ingrained dirt whilst enhancing the natural colour of the tiles to provide an aesthetically appealing appearance. You may recall the owner had requested a matt finish so after applying a couple of coats the job was done.

Welsh Slate Kitchen Floor Tiles Part Sealed Ticknall Derby
With the tiles clean and now protected with the colour enhancing matt sealer I asked the customer to inspect the floor. As you can imagine she was very pleased with the result and left the following comment on the Tile Doctor feedback system.

“Mr Mall was a very efficient, hardworking and helpful worker. The end result was excellent and I am delighted with the outcome. Highly recommend…”

Welsh Slate Kitchen Floor Tiles After Cleaning and Sealing Ticknall Derby
 

Professional Deep Cleaning of a Stained Slate Kitchen Floor in Derbyshire

Refreshing Dull Slate Kitchen Floor Tiles in Ticknall Read More »

Yorkstone Floor Before and After Cleaning and Sealing in Deepcar Sheffield

Yorkstone Tiles Rejuvenated in Deepcar near Sheffield

This customer living at a property in Deepcar near Sheffield, experienced problems keeping their twenty year old Yorkstone floor clean and I was asked to take a look and see what could be done to resolve the situation.

After inspection I could see that the sealer had worn off and now dirt had become lodged in the pores of the stone, leaving the floor looked grey and dull to the extent even the customer couldn’t remember that their stone floor had some colour once! Due to all the problems the customer had with experienced with the floor, they had reached the point where they were thinking of ripping the floor up entirely.

Yorkstone floor before cleaning and sealing in Deepcar Sheffield
Luckily they had found Tile Doctor and I was more than happy to see what I could do to resolve the problem. Yorkstone is similar to Sandstone which I was very familiar with, so I assured them the floor could be rejuvenated and conducted a test clean on a patch of the floor. Seeing the result, the customer was happy to go ahead with the work.

Yorkstone floor before cleaning and sealing in Deepcar Sheffield

Cleaning a Dull and Dirty Yorkstone Tiled Floor

To clean the floor and strip away old sealers, I used a strong dilution of our alkaline cleaner known as Tile Doctor Pro Clean, working it into the stone with a black scrubbing pad fitted to my rotary machine. I followed by removing the dirty and chemical-infused water from the floor with a wet vax machine.

Although this combination worked really well, I still found some light traffic areas where some of the old sealer remained. In order to restore a floor properly you have to strip the floor right back and remove all the old treatments from the floor otherwise the final result can look patchy and you may find the new sealer isn’t compatible with the existing.

To these problem areas I applied Tile Doctor’s Remove & Go, which is a dedicated
stripper and coatings remover, applied with a long dwell-time it can remove sealers, draw out ingrained stains and eliminate heavy grease build-up. I left the Remove & Go to soak into the stone for about ten to fifteen minutes before scrubbing it in with the black scrubbing pad, following again by removing the resulting slurry from the floor with a wet wax machine and rinsing the area with water. After the floor was successfully cleaned I carefully rinsed it again to get any trace of cleaning product off the floor and then dried it as much as possible with the wet vacuum.

Sealing a Yorkstone Tiled Floor

I returned to the property the next day, starting by making sure that the floor was completely dry for sealing. Unfortunately, there were some areas that were still very damp. I worked on these damp areas with my heat gun, but couldn’t get them dry enough, so after consulting with the customer, I decided to leave it to dry for another day with heating on maximum and doors/windows opened.

Upon my return these problem areas were less severe, and I managed to get them dry by applying my heat gun for an hour. When the floor was ready to be sealed I applied six coats of Tile Doctor Seal & Go Sealer, which is a water based sealer (no smell) that provides durable protection and a high quality satin finish.

Yorkstone floor after cleaning and sealing in Deepcar Sheffield
The customer was really happy with the work carried out and left the following feedback:

“Tony has done a fantastic job on our kitchen floor, which I was considering ripping up due to the state of it – but now it looks like new! Tony was punctual and very hard working – excellent customer service. Have already recommended him to a colleague.”

Yorkstone floor after cleaning and sealing in Deepcar Sheffield
 

Professional Stone Tiled Floor Restoration in Deepcar

Yorkstone Tiles Rejuvenated in Deepcar near Sheffield Read More »

Victorian Floor Before and After Renovation in Littleover

Victorian Tiled Floor Renovation in Littleover

From The 1860s Victorian tiled floors started to appear in public buildings and by the 1890s they had become an essential feature in the most ordinary Victorian terraced houses. Although these floors fell out of fashion during the 1960s and ’70s, when many of them were covered over, they are now being rediscovered by their present owners and this is exactly what happened to my customer in the village of Littleover.

Victorian floor before renovation in Littleover
The customer had attempted to clean the floor by themselves but they couldn’t archive the result wanted, fortunately they discovered the Derbyshire Tile Doctor and after their call I went over and did a test for cleaning to make sure I can archive the needed results. They were happy with what they saw, so they booked me in to complete the work.

Victorian floor before renovation in Littleover

Cleaning a Victorian Floor Tiles

For cleaning the hallway I used a strong dilution of Tile Doctors Pro Clean which is strong multi-purpose high-alkaline cleaner. I left the Pro Clean to dwell for 10 minutes and then worked it in the tiles by using a strong black scrubbing pad fitted to my rotary machine. After scrubbing I rinsed the floor several times with clean water to remove any trace of cleaning product from the floor.

After successfully cleaning the hall I moved on to the porch which still had some old topical sealer on less walked areas. On these areas I had to use Tile Doctors own very effective stripper Remove and Go. Remove and Go has a long dwell time to remove any given sealer or wax so I left it to soak in for fifteen minutes followed by scrubbing it in with black pad fitted to rotary machine. The next step was to wash off the residue with water which was then removed using a wet vacuum.

Victorian floor before renovation in Littleover Victorian porch floor before renovation in Littleover

Following this the tiles were given a rinse with Tile Doctor Grout Clean-up which is an acid based product that can remove grout smears and mineral deposits. Last step before sealing was to give the floor a thorough wash down with clean water to remove any cleaning product left on the tiles and then I left the floor to dry overnight.

Sealing a Victorian Tiled Floor

Next day when I returned I used my damp tester to make sure that the floor is completely dry. Luckily for me floor was all dry and I started sealing. For sealing I used Tile Doctors Colour Grow Sealer which is colour enhancing breathable sealer. I applied 2 coats of the sealer and after every coat I polished off the excess with clean cotton cloths.

Victorian floor during sealing in Littleover
The result was really good and my customer was very happy with the work and said that now the floor looks transformed.

Victorian floor after renovation in Littleover
 

Professional Victorian Tiled Floor Restoration in Derbyshire

Victorian Tiled Floor Renovation in Littleover Read More »

Deep Cleaning a Shower Cubicle In Ramsbottom Before and After

Grout Cleaning and Recolouring for a Stained Shower Cubicle in Ramsbottom

Many homeowners will be able to relate to this post about tiled shower cubicles which can become mouldy, grubby, and just plainly unappealing to look at. The reality is that dirt, mould, and stains can be quite easily removed with the right products if addressed on a regular basis. However, many busy homeowners simply don’t have the time, and subsequently the mould problems gradually worsen over time. This is what had happened at this property in Ramsbottom (a town known for its annual Chocolate Festival) – the customer’s Ceramic tiled shower cubicle had not been adequately cleaned in a long time, resulting in severe staining that would prove impossible to remove entirely.

Deep Cleaning a Shower Cubicle In Ramsbottom Before
When the customer contacted me after finding Tile Doctor over the internet, I suggested that I could provide the grout with the best clean possible before re-colouring the grout with a white Grout Colourant to hide the staining and it back to looking similar to its original condition. The customer agreed that this would be the best course of action, and booked me in to complete the work.

Deep Cleaning a Shower Cubicle In Ramsbottom Before

Cleaning Ceramic Tiled Shower Cubicle Grout

The first step in the restoration was to get the grout ready for the new Grout Colourant to be applied. This involved cleaning the grout with Tile Doctor Pre-Treat Cleaner, which successfully removed the various dirt, soil, soap scum and hard water deposits that had built up after plenty of exposure to acidic shampoos and soaps. Getting the grout joints clean allows the colourant to form a better bond with the grout.

The Pre-Treat Cleaner was sprayed onto the grout and left to dwell for roughly five minutes before being agitated with a grout brush. Next, I rinsed the grout with water and removed the old and mouldy silicone around the shower cubicle.

Colouring Grout and Siliconing for a Ceramic Tiled Shower Cubicle

After running tests I discovered a few damp issues, but these were quickly resolved with the help of my heat gun. With the grout now ready to be coloured, I applied two coats of Tile Doctor’s white Grout Colourant, allowing the first coat to dry before applying the second.

Deep Cleaning a Shower Cubicle In Ramsbottom After
The Grout Colourant is an epoxy-based product that seals and rejuvenates the grout, protecting it against future staining and making it easy to clean in the future. After completing the grout colouring I cleaned up the area – including removing any excess product – and then applied fresh silicone in a matching white around the base of the shower cubicle.

Deep Cleaning a Shower Cubicle In Ramsbottom After
As you can see from the photographs, the appearance of the shower cubicle was transformed by the new Colourant. My customer even left the following comment on the Tile Doctor feedback system:

“Tony was polite punctual and efficient. We are very happy with his work!”

Dirty and Stained Ceramic Tiled Shower Cubicle Restoration in Derbyshire

Grout Cleaning and Recolouring for a Stained Shower Cubicle in Ramsbottom Read More »

Terracotta Floor Before and After Cleaning and Sealing in Matlock

Restoring the Look of Badly Stained Terracotta Kitchen Tiles in Matlock

Having an effective sealer in place is essential for ensuring the long term condition of tiled floors in fact a lack of sealer can make cleaning the tiles exceptionally difficult as the sealer prevents dirt becoming ingrained in the tile.

Terracotta Floor Before Cleaning and Sealing in Matlock
This property owner, living in the former spa town of Matlock in Derbyshire, was experiencing problems with their Terracotta tiled kitchen floor since they had applied some kind of wax to act as a sealer, and this had worn off within a few weeks. After this happened the tiles were not sealed again, making cleaning a big problem. Terracotta is a highly porous stone and thus easily soaks in spillages and stains, and allows dirt to become very easily trapped.

Terracotta Floor Before Cleaning and Sealing in Matlock
In this situation, the property owner resolved to contact me about some professional maintenance. I suggested that the tiles would need a deep clean followed by the application of a fresh, high quality sealer. The work was agreed on and I made my way down to the property the following week.

Cleaning a Dirty Terracotta Tiled Floor

When I arrived at the property and saw the tiles first hand it became clear that a professional clean had been in need for a long time: greasy looking stains were particularly prevalent and covered large areas of the kitchen floor.

To remove I mixed a strong solution of Tile Doctor Pro Clean, which is a multi-purpose, high-alkaline cleaner, stripper and degreaser, and, working in small areas, applied it to the floor. Working in small sections was important because the stone is very porous and quickly soaked in any product laid down. I scrubbed the cleaner into the stone using a rotary machine fitted with a black scrubbing pad, with the dirt and stains coming away nicely. Pro Clean is highly versatile and can be used for similar cleaning purposes on most types of natural stone floor.

After cleaning each section, I quickly removed the excess dirty water and chemicals with my wet vax machine. Once the whole floor had been cleaned I rinsed it several times with fresh water just to make sure all cleaning chemicals were gone. I then left the floor to dry completely for 36 hours.

Sealing a Terracotta Tiled Floor

When I returned to the property, I conducted several damp tests to check for any areas of the floor that needed further drying. As is almost always the case, there were a few areas that remained slightly damp, and I set about speeding the drying process along using my heat gun. In fact, it actually took me more than three hours to get the floor completely dry, but this was worth the effort as even the slightest excess moisture can damage the performance of the sealer.

Once the floor was finally dried I began sealing the floor with one coat of Tile a Doctor Colour Grow sealer. Colour Grow is an impregnating sealer that penetrates deep into the pores of the stone, thus acting as a shield against ingrained dirt, and also raises the colour of the tiles to provide an aesthetically appealing appearance. sealer. After sealing with Colour Grow, I left the floor to dry for couple of hours and then applied six coats of Tile Doctor Seal & Go, which is a topical sealer that builds up durable protection on the surface of the tiles.

Terracotta Floor After Cleaning and Sealing in Matlock
The combination of through cleaning and the application of not one, but two high quality sealers really did wonders for the appearance of these Terracotta tiles. Looking at the final results you wouldn’t have believed they had been without a proper clean and seal for so long! Needless to say the customer was exceptionally pleased and will surely be able to keep her floor looking great for a long time to come.

Professional Deep Cleaning of Stained Terracotta Kitchen Floor in Derbyshire

Restoring the Look of Badly Stained Terracotta Kitchen Tiles in Matlock Read More »

Travertine Floor After Burnishing in Ashbourne

Dull Travertine Kitchen Floor Burnished and Polished in Ashbourne

This customer had some real difficulty in getting their fantastic Travertine tiled kitchen area looking as good as it should. The cleaning methods they had previously employed were unable to prevent the tiles from appearing dull, and the customer was also unable to deal with the displeasing marks and small cracks damaging the stone.

Travertine Floor Before Burnishing in Ashbourne
Keen to get the floor back to looking its best, the customer called me down to their property, which overlooks the beautiful countryside area of Ashbourne, to see what could be done to restore the tiles.

Travertine Floor Before Burnishing in Ashbourne

Burnishing a Dull Travertine Tiled Floor

Upon my arrival at the property, I assessed the situation and resolved that the best way to restore the polish and general appearance of the floor was to use a process known as burnishing. The burnishing process, which involves the application of four diamond encrusted polishing pads of varying grit, works to grind away ingrained dirt while smoothing and polishing rough surfaces. Most commonly we use burnishing to restore the shine to Limestone and Marble tiles, but it can be used on most types of natural stone floor where a deep polish is required.

To start the process, I applied the Coarse 400 grit burnishing pad to the floor using a small amount of water as lubrication in order to break down and remove any old sealer from the stone. Once this had been done across the entirety of the floor, I removed any soiled water with a wet-vac machine; this removal of soiled residue was repeated after each use of a burnishing pad.

Next, I moved on to the Medium 800 grit pad which is less coarse than the 400 grit, but still rough enough still to break down layers of ingrained dirt. I followed this up with the application of a Fine 1500 grit pad, which started to smooth down the rough areas of the surface to prepare the floor for a final polish with an even finer burnishing pad later on. Before moving straight on to the final of the four pads, I took the time to carefully fill in the all of the small cracks and holes in the stone, before leaving the floor to dry until the next day.

Sealing a Travertine Tiled Floor

The next morning, I returned to the property to finish off the floor restoration. As soon as I arrived I used a damp tester to make sure the floor was completely dry. Noticing a number of small damp spots, I opted to use my heat gun to speed up the drying process.

Once the floor was completely dry, I used the Very Fine 3000 burnishing pad – the last of the four – without any lubricant to finally achieve a high quality polished finish. For polished floors it is recommended to use an impregnating sealer that penetrates into the pores of the stone rather than sitting on the surface of the floor, as this ensures the quality of the polish isn’t damaged.

As such I opted to use Tile Doctor Colour Grow to seal the tiles. This is a colour intensifying sealer that provides durable surface protection and allows the surface to breathe whilst enhancing the natural colours in the stone. It’s important that any sealer that doesn’t penetrate into the stone is removed by polishing it off with a cloth.

Travertine Floor After Burnishing in Ashbourne
After completing the seal, I went over the floor for a final time with the 3000 grit diamond burnishing pad to leave a smooth and shiny polished finish. Needless to say that the customer was very happy with result as they had never before been able to get the floor looking this good!

Professional Polishing of a Dull Travertine Tiled Kitchen Floor in Derbyshire

Dull Travertine Kitchen Floor Burnished and Polished in Ashbourne Read More »

Victorian Floor Dated 1929 After Cleaning and Sealing

Fantastic 1920’s Victorian Tiled Floor Unearthed and Restored in Derby

Victorian tiled floors are timeless – despite first coming into popular use in UK houses during the 19th century, they’ve remained stylish in the eyes of many homeowners and interior designers. This fantastic black and white patterned example at a property in Derby dates back to 1929. However, the owners only recently discovered the floor, it having being hidden under carpet for many years.

Discovering a tiled floor beneath carpet like this is, in my experience, a relatively common occurrence, yet it can be difficult to restore the tiles back to their original condition without professional assistance. In this instance – as is the case with most examples – the tiles were marked with numerous glue stains from where the carpet had been originally installed. Initially, the customer had tried to clean the tiles themselves but, despite successfully removing most of the glue stains, they couldn’t achieve the full restoration they were hoping for.

Victorian Floor Dated 1929 Before Cleaning and Sealing
This is where I stepped in – to provide the floor with the deep clean and fresh seal it desperately needed.

Victorian Floor Dated 1929 Before Cleaning and Sealing

Cleaning a Victorian Tiled Floor

While the customer had succeeded in providing the tiles with a basic clean, I needed to take it one step further. To do this, I firstly mixed a strongly diluted solution of Tile Doctor Pro-Clean and water, before applying this to floor and scrubbing it directly into the tiles using a black scrubbing pad fitted to my buffing machine.

Pro-Clean is multi-purpose high-alkaline cleaner, stripper and degreaser. This did the job to remove ingrained dirt in large areas of the floor, but in some places a stronger product was required. To tackle these stubborn areas, I used Tile Doctor NanoTech HBU, which was applied to the floor in combination with my steam cleaner. NanoTech HBU is a heavy soil build-up remover designed to reaches areas within the stone that other cleaners are unable to. It utilises nano-sized particles to penetrate below tough stains, dissolve them, and lift them out.

After a thorough clean with this product the floor looked ready to be sealed. Nonetheless, before moving on to the sealing process, I carefully rinsed the entire floor three times with fresh water to rid the floor of any excess chemicals left over from the cleaning. I then removed the water with my wet vax machine.

Sealing a Victorian Tiled Floor

I left the floor to dry for five days as there was a slight dampness issue in one corner. When I returned to the property, I made sure the floor was completely dry by conducting several damp tests. The corner with the damp issue was just a bit damp still, so I opted to use my heat gun to solve the problem, and not long after the floor was ready for sealing. Removing all excess moisture before sealing is essential as it can cloud the sealer and damage its ability to protect the tiles.

For sealing, I used four coats of Tile Doctor Seal & Go Extra sealer. This is a special acrylic-based formula which allows moisture vapour transmission making it fully breathable and ideal for situations where no damp proof membrane has been installed and where mineral salt deposits (efflorescence) are more likely to occur which is not uncommon with these old floors. As well as enhancing the appearance of the floor the sealer will provide a layer of protection to the surface of the tiles and prevent dirt and stains from becoming ingrained in the pores.

Victorian Floor Dated 1929 After Cleaning and Sealing
The results of the restoration were fantastic – in fact, if you had seen the restored the floor for the first time, you might have thought it was only recently installed! As you can see from the Before and After photos, the floor was completely transformed, from a dull, dirty and worn condition to looking almost brand new.

The customer was very happy with the work and no doubt will be much looking forward to showing off her new floor!

Professional Victorian Tiled Floor Restoration in Derbyshire

Fantastic 1920’s Victorian Tiled Floor Unearthed and Restored in Derby Read More »

Chinese Riven Slate Before and After Cleaning Sealing in Chesterfield

Poorly Maintained Chinese Riven Slate Tiles Restored in Chesterfield

This customer was very happy to find there was a Tile Doctor in Derbyshire, for a long time they had experienced problems with cleaning their fantastic Chinese Riven Slate tiled kitchen floor. The customer had attempted to carry out some amateur maintenance work on a couple of occasions but had never managed to achieve the results they had hoped for.

Thus the floor remained dull and afflicted with a large amount of ingrained dirt. I visited the property, located in Chesterfield, to see what could be done to restore the condition and appearance of the tiles.

Chinese Riven Slate Before Cleaning in Chesterfield Chinese Riven Slate Before Cleaning in Chesterfield
Chinese Riven Slate Before Cleaning in Chesterfield

Cleaning Dull and Dirty Chinese Riven Slate Tiles

In order to begin the cleaning process, it was first necessary to remove many layers of old and ineffectual sealer from the tiles. Dirt had become trapped in the sealer, and the was worsened by the fact that the customer had continued, year on year, to reseal the tiles without removing the existing sealer.

For stripping away the large amount of old sealer I applied Tile Doctor Remove & Go and scrubbed it into the floor using a rotary machine fitted with a poly brush. Remove & Go is a multi-purpose stripper formulated with a long dwell-time to remove
most sealers. And while it worked in most places, it couldn’t get rid of all the sealer. I opted in this scenario to mix the Remove & Go with Tile Doctor NanoTech HBU, a powerful cleaner and remover that uses nano-sized particles to tackle the toughest of stains, substance build-up and ingrained dirt.

The combination of these two products worked exceptionally well not only to remove the old sealer, but also several years’ worth of muck, without any additional problems. I follow the cleaning with a through rinse with clean water to remove any chemicals left on the floor. Finally, I left the tiles to dry out overnight.

Sealing Chinese Riven Slate Tiles

When I returned to the property the following morning I had to make sure that the floor was completely dry by running several damp tests. This is exceptionally Important as any excess moisture can cloud my fresh sealer you choose to apply, potentially damaging its performance. I found a couple of damp places and worked on them with my heat gun until they were no longer a problem.

When the floor was completely dry I applied 5 coats of Tile Doctor Seal & Go sealer which is a water-based blend of acrylic polymers that gives you stain resistant surface protection and a long lasting low-sheen finish.

Chinese Riven Slate After Cleaning and Sealing in Chesterfield Chinese Riven Slate After Cleaning and Sealing in Chesterfield
Chinese Riven Slate After Cleaning and Sealing in Chesterfield

The customer was extremely happy with the results, leaving the following comment on the Tile Doctor feedback system:

“Tony was a thorough professional, committed to doing as perfect a job as possible. He understood the material he was working with and did not skimp on taking the necessary time to complete the restoration. He gave us advice about future care and treatments and at all times behaved with the utmost courtesy and respect. His presence in the house was quiet and unobtrusive so that the disruption seemed minimal. He could not have been more obliging and he left the site clean and tidy even before the final completion of the job. Seeing him work restored our faith in a craftsman’s skill and technique.”

Professional Chinese Riven Slate Tiled Kitchen Floor Restoration in Chesterfield

Poorly Maintained Chinese Riven Slate Tiles Restored in Chesterfield Read More »

Revolucion De Cuba Bar Top Before and After Polishing Manchester

Dull Marble Bar Top Rejuvenated at Manchester Club

Revolucion de Cuba is one of the biggest and busiest bars in Manchester. With the sheer amount of customers that visit the bar, the Marble counter top had become very worn and dull.

Stains and spillages are inevitable in an environment like this, but this can cause long lasting damage to the sensitive natural stone if proper maintenance is not provided. The bar owners hold very high standards for the appearance of the venue and as such were keen to get the Marble bar top back to looking its best. They called the Derbyshire Tile Doctor and I was more than happy to see what I could do.

Revolucion De Cuba Bar Top Before Polishing Manchester Revolucion De Cuba Bar Top Before Manchester

Burnishing a Marble Bar Top

When it comes to restoring high-end polished stone surfaces, such as Marble and Limestone, we usually opt to use the process known as burnishing. Which involves the use of several different grades of diamond encrusted pads to remove dirt and stains, as well as gradually restoring a smooth and aesthetically pleasing polish to the stone. In our system we use four pads, ranging from Coarse to Very fine grit pads.

I started with 400 grit six-inch Coarse pad on the bar top fitted to a hand buffer with some water added for lubrication, this action removed the old sealer, stains and scratches on the surface. Before moving on to the next pad I made sure to rinse the bar top and then removed the slurry with a wet vacuum. This process was then repeated with the 800 grit Medium pad before moving on to the 1500 grit Fine pad to begin to smooth down the surface ready for the final polishing. This was a long section of Marble so the whole process took some time as you can imagine.

Revolucion De Cuba Bar Top During Polishing Manchester Revolucion De Cuba Bar Top Before Manchester

After finishing with the third pad I carefully filled the visible cracks and holes in the stone using epoxy resin mixed with marble powder, before leaving to dry completely overnight. The next day I returned to the venue and went over the bar top with the final of the four pads, the 3000 grit Very Fine pad (this time without water as lubrication) to achieve the final polish.

Revolucion De Cuba Bar Top After Polishing Manchester Revolucion De Cuba Bar Top After Polishing Manchester

Sealing a Marble Bar Top

After completing the polishing process, I began sealing the Marble. I opted to use Tile Doctor Ultra Seal, which is a premium natural-look penetrating sealer formulated to provide maximum stain protection, making it ideal for use on natural stone bar tops and kitchen counters.

Revolucion De Cuba Bar Top After Polishing Manchester
It’s really important to polish off all the excess sealer that doesn’t penetrate into the stone, and to do this I used the Tile Doctor three cloth system. Once the fresh sealer had been applied, I went over the surface once more with the 3000 grit pad to leave an extra smooth and shiny finish.

Revolucion De Cuba Bar Top Before and After Manchester
The bar owners were very pleased with the work, opting to take up our maintenance plan program to ensure this great Marble bar top continues to look as good as it does now in the future!

Professional Marble Bar Top Restoration at Manchester Nightclub

Dull Marble Bar Top Rejuvenated at Manchester Club Read More »

Scroll to Top